Navigation

Home Craft Works Medicine Tutorial Visit My Shop on Facebook! Dorm Cooking Image Map
Showing posts with label arts. Show all posts

Wednesday, February 20, 2019

MISTI Dupe

When I saw the MISTI stamping tool on youtube, I was really amazed by it! I mean the one who invented it is a genius! Finally a tool that solves a problem in stamping, doubling or shadowing of the image when you try to stamp it again.

Unfortunately, this amazing tool is not available in the Philippines.  So I searched for a dupe and I found this.  This idea is not mine, I saw this in youtube from another crafter.  But hey, this is something I could find here.

This tool actually cost me only Php 100.

The materials you will need:

Pin It Now!

Tuesday, May 1, 2018

Giraffe Body Painting - 1st Time Experience

Just finished crying, I couldn't write a blog just a while ago, but after I've found composure decided to write something to lift my spirits up at least just a little.

I've written that one of the induction to PUA as an incoming urology resident is Body Painting.  Here's my experience as the contestant.  Now, I'm sharing the experience, as the painter.  This is my first time doing body painting.  With no experience, without studying about it, just do it, "Bahala na si Batman".

So I was requested by my junior to help him out in his body paint.  I didn't agree at first, well because I've been so tired lately.  I felt blank, unmotivated, tired etc...  Eventually, after around 3 days since he requested, I somehow was able to recover so I found myself in front of his poster paints.

Warning though, DO NOT USE Poster Paints to your skin.  There's a reason why there's such a thing as body paint.  Poster paints were not made to be placed on your skin.  But these were just the paints bought by my junior so I have no choice anyways but to use them.

So below were the materials: yellow, brown and black poster paints, paint brushes, bowls and makeup sponges.
Pin It Now!

Thursday, March 1, 2018

Otterly Beautiful Day - Shaker Card

I'm starting my birthday month with spreading happiness.  Hope I can have the time to push this through.  February was a sad month for me.  I guess I just have to counteract this negativity for some time.

Starting with very cute otters!  This was my first time to use Copic Markers, I think I have to have some learning curve using these markers, even knowing about the proper paper.

Pin It Now!

Tuesday, December 13, 2016

Closet Costume: Mime

And so I went to another party and I only discovered that the party had a 'theme' 1 day before the party.  No time to make special costumes, not even have a time to rent some costume online.

I attended for the first time a christmas party from another institution besides UST, this was Cardinal Santos Surgery Christmas Party and it was titled: "Cirque du Surg".  Carnival was the theme of the christmas party.

Looking at carnival costumes, I would really love to be a ringmaster or a showgirl with all the glitters, sequins, wig and makeup! But with less than 24 hrs to prepare, I had to do with what I have in my closet.

Then this came to the picture:
Pin It Now!

Saturday, December 3, 2016

Poison Ivy Armband & Legband Tutorial

Another part of Poison Ivy Costume DIY
You can check the Socks Boot Cover Tutorial & the Headdress Tutorial to know how I made those accessory and you can check the overall look in here

Now let's start with my very childish introduction:
Of course Uma Thurman's version of Poison Ivy Costume wouldn't be complete without the glitters!!!!

I don't have time to put on body glitter, so I decided to make an armband and legband (if that's what it's called) instead.

Materials:
Green felt fabric (hard)
Paper & Pencil
Green & Gold glitters
PVA Glue
Elastics
Sewing Kit


Step 1 - Measure your arm width and your leg width and cut the appropriate elastic length.  Sew the two ends together to form a ring. Draw different sizes of leaves into your paper.
Step 2 - Cut these patterns and use them as guide to cut your felt fabric shapes.  Cut many shapes using the different sizes of leaves.

Step 3 - Place some glue onto your felt fabric and pour glitters over them!!  Allow to dry
Step 4 - Glue the pieces onto the elastics.  Remember to use only drops of glue, do not glue the entire elastic and just place the leaves on top, this will harden the elastic and it will not be elastic anymore. 


And you're done!


Pin It Now!

Poison Ivy Headdress

This is a part of Poison Ivy Cosplay tutorial series. You can check how I made the boot cover using in this page: Socks Boot Cover Tutorial
The arm band and leg band can be found here: Arm Band & Leg Band Tutorial
The overall look can be found here: Poison Ivy Cosplay

Let's first look at our inspiration for the headdress:

The version played by Uma Thurman is one of my favorite versions of Poison Ivy Costume.

Materials needed (I bought everything in Dangwa, except for pliers and glue gun):
red headband
plastic leaves
fake fabric red roses
wire
pliers
glue gun
Fake red crystals / sequin flowers


Step 1 - Remove all the rose buds from the fake flower stem.  Remove also some small leaves from the leaf bouquet.


Step 2 - Using your hot glue, glue the roses into your red headband.
Step 3 - Wrap the wire of your crystals and sequin flowers in between the roses.


Step 4 - Glue in the plastic leaves.  

Step 5 - You're Done!!!!
Here's a picture when worn.

Pin It Now!

Monday, March 28, 2016

Ribbon Wands - Tutorial

We'll be performing ribbon dance and I have to make some props.  Ribbon wands of course! What's a ribbon dance w/o ribbon wands?

Materials:


  • Long silk ribbon
  • Dowels - I bought mine from @binondopabili (Instagram account)
  • Washi Tape or Masking Tape
  • Scissors
  • Lighter
Step 1 - I heated the ends of my ribbon to avoid having frizz mess.


Step 2 - Attach 1 end perpendicular (upright) to the end of the dowel stick.


Step 3 - Secure the end with wash tape or masking tape.

And you're done!

Pin It Now!

Sunday, March 27, 2016

Socks Boot Cover Tutorial

I'll be doing a cosplay soon for an event.  I've been looking for green boots for the look of the character.  But unfortunately, the 2nd hand shoes in OLX are too big for my size, plus I'm not used to wearing boots, so I'm not sure if my feet can tolerate wearing one.

I went to 2 malls, Robinsons Magnolia & SM San Lazaro, no shoes to match the look.  There are green high heels but my feet can't tolerate them... They really HURT! How on earth do people and actresses run in those things?!

I then thought of why not boot covers? Since they're popular to cosplayers, as alternative for their shoes.  You can wear your own high heels which has been proven to be comfortable for you and plus, they're cheap and easy to make.

I asked around Facebook & online shops, how much will it cost me to have one made.  They answered Php 1500.  Expensive! I might as well buy a new pair of boots!

Anyways here is a 'cheat', on how to make boot cover:

Materials:

  • A pair of thick socks
  • Scissors
  • Your high heels/boots


Step 1 - Insert the socks into your shoe.


Step 2 - Cut a small hole at the heel part of the shoe over your socks.


Step 3 - Slide the heel into the hole you've created.


Step 4 - Do the same with the other pair.


And you're done!

Summary:

To see the overall Poison Ivy Look: Poison Ivy Cosplay
To see the respective DIYs in the series: Poison Ivy Arm Band & Legband TutorialPoison Ivy Headdress Tutorial
Pin It Now!

Friday, March 18, 2016

Craft Fail - customized WIFI skin

Learning is a process of success & failures. I think it's time I also place my failures here, so that other crafters may learn from my mistakes.

I made a customized wifi device skin last 2012(Customized WIFI Skin).With the advent of 4g and LTE internet, I bought another 4G compatible device, which did not last long since my senior resident lost it when he borrowed it.  So time to use again my old wifi device.

Now comes how the skin survived the times...


The vinyl sticker is still intact, it still protects the wifi device, but the print already melted. Probably from the heat of the battery when turned on.

Lessons learned: 
Can't use inkjet printer ink, to skins that will be placed to devices that produce heat.

Til the next craft project!
Pin It Now!

Sunday, January 17, 2016

Conquering Fear: Watercolor Pen

When I was a kid, my favorite materials for coloring are: colored pencils > crayons > poster paint > oil pastels.

Watercolor well, it didn't work out. I hated the brush included in the kit, when I was a kid I didn't like the mess I make in my paper when I try the watercolors, and the colors were light.

Then as I was in my 3rd year residency (urology 1st year), adult-coloring is a trend. Then I discovered the water pen. 

To whoever invented the water pen, BLESS YOU!!! You should win an award for your contribution to the arts & craft world. I can was able to color w/ watercolors at last!


This was colored with pure watercolors only! Isn't it great?!


I'll try out more!
Pin It Now!

Saturday, January 2, 2016

Philippine Urology Residency Induction Series

2015 was the year I start as a first year resident in Urology.  I'm in the straight program of UST Urology.  This training program consists of 2 years of general surgery residency then 4 years of urology proper.

When you're 1st year, you're again back to the bottom of the hierarchy.  So you get to undergo a series of induction 'ceremonies'.  For Urology 1st year, this consists of 3 in total for your first year, and another one for your 2nd year.

So let's start with the first one.

This is the PURA (Philippine Urology Residents Association) Induction.  Here they welcome you as a new member of the PURA.  I personally think PURA is a great idea.  If you want to get in touch with other urology residents of other institutions, you just tap into PURA and you're sure to get good results.

For 2015, the theme of the PURA induction is BURLESQUE.  So you have to give a video presentation to introduce yourselves and at the induction night, you have to give a presentation relating to the theme.  There's a video of the presentation which I will not post in public hahaha. It's one of those times you wouldn't want others to see it.  And yes, we had a burlesque theme dance routine, music, and yes again, I took my clothes off literally one by one (but not up to completely off). It was nice that all my seniors were there to support us. I have a batch mate, Ivan (with nickname Yvon) who is in the rightmost of the picture.


The 2nd induction ceremony is from NKTI's Talent Show, they call it Talentadong Uro.  But this year is different, they adapted the Your Face Sounds Familiar format and called it Uro Face Sounds Familiar. This was hard, since none of my talents are in the category of singing or dancing.  But hey, this is like cosplay, you get to dress up and act like someone else.  I consulted my most trusted hairstylist and he said, I should be Vilma Santos since we're both petite and of fair complexion.

For the performance I was able to check youtube and found this Caronia ad by Vilma Santos.  The steps were easy to learn and the performance was short. 


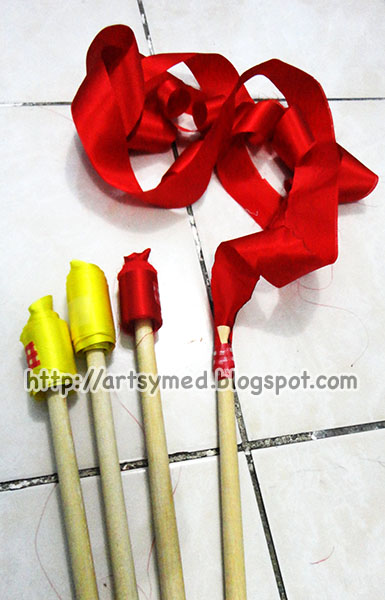
Another great point of this was that I was able to insert some craft project into it.  Her hairpiece, the orange flower, I made my own to match with my costume.

Here's my finished get-up


I won 3rd place in this competition.  Yup, there's a video also of the presentation, which I will not post in public. Hahaha!

For the 3rd and last for the year 2015, it's the Mr & Ms Urology Pageant.  This is the most grand of all induction series.  You'll spend some money and this is to my surprise with legit pageant format.

Of course not always do we have a Female Urology resident, so in the pageant I was the only legitimate Ms Urology.  In other institutions where they have male urology resident, they look for their own partners, either a professional dancer, a beautiful nurse, a co-resident, an intern, a junior intern, etc.

What I love with this pageant was that the theme for the year was "Victorian". It was always been my dream to wear a victorian inspired dress.  And I was given the opportunity for this event.  I was giddy like a child when I was able to wear the balloon dress.

This was our costume for the photoshoot

And then for the pageant proper, this consisted of 4 parts. 1st was the Victorian Dress.
This was my most favourite of all the costume.

The 2nd part was the talent portion.  We did synchronised swimming. =D. No pictures, for this part sorry.

For the 3rd part, it was the formal dress part.

The 4th part was the swimsuit part.  For the first time ever in my life, I wore a two piece bikini.  It was new for me... and I'm not very comfortable with it.

No close-up for this part of the competition.  Of course judging from the tall and lean other contestants, I lost in this competition.  But, my thinking during that time was... Let's get this over with, I'm really tired.  Kudos to the professional models, walking on runway in very high heels is quite tiring.

This year's last induction series will be the body painting contest.  Again, it's artsy so I can't wait for it =D. 
Pin It Now!

Wednesday, December 30, 2015

Emperor-Style Tea Party

Today's dad's celebration of his birthday is different than the previous years.  My other family members are abroad celebrating in another country, somewhere in Europe (Spain, Portugal, etc).  So I made sure not be duty today.  That way, my younger sister and I can celebrate his birthday with him.

I've been thinking yesterday of how to make his birthday celebration special.  And I thought of making him breakfast in bed.  As I was looking through google of what does a chinese breakfast look like? Here's what I saw...


Then I thought, why not put my touch into it? Meaning... make it girly! hahaha.  So I thought of using my dainty teapots, teacups, plates etc. Typically for 2-tier plates, in England, they put in pastries.  But dad is not a fan of pastries. So I thought of placing dimsum in the pastry plates instead


Then I had an Intern, Lauren who mixes her own tea blend of lavender and stuffs.  So I used that her tea blend to make a pot of lavender tea.


I think the end result was a success! I believed he felt special on his special day!


Here's my dad, eating his breakfast, emperor-style with western and chinese fusion


Yup, this is one of those moments, you have to capture to remember forever.


Pin It Now!